One Year Anniversary!!!

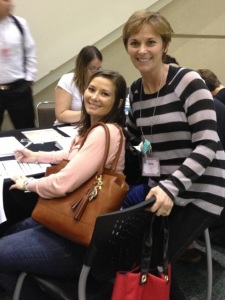
My mom helping me fill out my paperwork to become an Independent Stampin' Up! Demonstrator.

My mom helping me fill out my paperwork to become an Independent Stampin’ Up! Demonstrator.

One year ago today, I filled out my paperwork at the Leadership Convention in Orlando, Florida to become an Independent Stampin’ Up! Demonstrator under my mom, Helene (who runs Helene’s Papercrafting!)  It was so much fun and very exciting to get to attend and be a part of the Leadership Convention that I had to be apart of Stampin’ Up! and I didn’t want to miss a minute more of the fun.

Since last January, I got to be apart of lots of great events that I helped my mom put on.  We attended a Crop-a-Thon, had a Sale-a-bration/Rachel’s a Demonstrator Party, had a fundraising event, held many classes and best of all… I was able to attend my very first Stampin’ Up! Convention!

It has been such an amazing, fun year and I don’t regret a minute of it.  I am so excited to see what my second year brings.  Thank you so much to my mom, who encouraged me to sign up and start Look Whoo’s Stampin’!

oxox Rachel

My husband making his paper pumpkin…

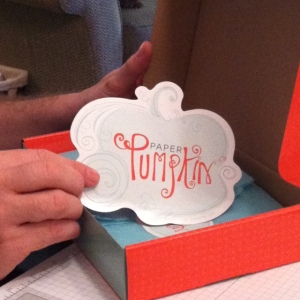
Kacy opening his paper pumpkin

Kacy opening his paper pumpkin

Kacy reading the directions

Kacy reading the directions

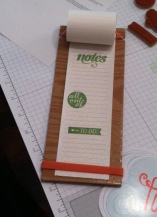
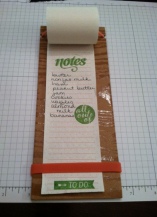
Kacy's completed memo board

Kacy’s completed memo board

Paper pumkpin is not just for women!  So I already posted about my October paper pumpkin but I thought you might be interested to know that my husband is also subscribing to paper pumpkin.  My husband, Kacy, likes to paper craft and often will join in when I am making a project.  I think his project came out terrific!

oxox Rachel

October Paper Pumpkin

Memo Board

Memo Board

Paper pumpkin kits aren’t always cards… this month it was a memo board!  It’s extremely cute and very useful!  When I was done creating mine I was so excited I started making my grocery list and forgot to take a picture of my project!  The colors in this project are calypso coral, gumball green and whisper white.  My favorite color is pink and my sister’s is green so I really thought that putting calypso coral and gumball green so nice.

oxox Rachel

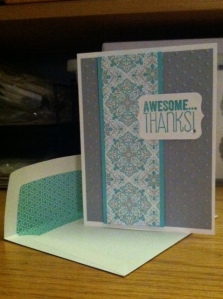
Awesome… THANKS!

Awesome Thanks!

Awesome Thanks!

Awesome Thanks!

Awesome Thanks!

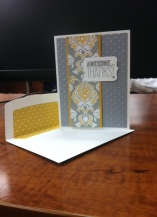
Recently I have had to make a couple of thank you cards.  I designed this card and decided to mix it up by changing the colors the second time I made it.  The Eastern Elegance Designer Series paper is so beautiful I had a hard time choosing which paper to use.  By making the second card a different color scheme I was able to use more of the paper and it made it an easier decision.  I love how both cards came out!  I also made matching envelope liners for both cards.  I was very excited to make the liners because it was the first time I got to use the envelope liner framelits die!  I think that both of the recipients of these cards will really appreciate them and see how grateful I am.  To make these projects I used the following items: Yippee-Skippee! Stamp Set (131344-clear, 131341-wood); Envelope Liners Framelits Dies (132172); Chalk Talk Framelits (129983); Perfect Polka Dots Embossing Folder (117335); Clear Embossing Powder (109130); Eastern Elegance Designer Series Paper (130131); Whisper White Cardstock (100730); Smoky Slate Cardstock (131202); Medium Envelopes – Whisper White (107301); Top Card only: Coastal Cabana Ink (131175) & Coastal Cabana Cardstock (131297) and Bottom Card only: Metallic Encore Pad – Silver (132142) & Crushed Curry Cardstock (131199)

oxox Rachel

September Paper Pumpkin

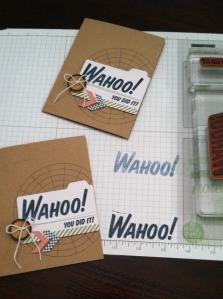
Wahoo! You Did It!

Wahoo! You Did It!

Wahoo!  Look at this card!!!  This is September’s paper pumpkin kit.  You get enough supplies to make four cards and you get four envelopes as well.  This card was so much fun to make.  I love the Wahoo! stamp and the file folder it is on.  This card makes for a fun congratulations card to show someone special just how proud you are of them.

oxox Rachel

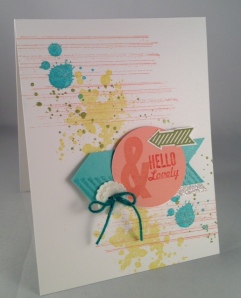
Hello, Lovely

Hello, Lovely

Hello, Lovely

This is my fourth (and sadly last) make and take from Convention.  The exciting thing about this card is it uses one of my favorite stamp sets – Hello, Lovely!  This card is so much fun and so easy because it doesn’t have to be perfect.  Gorgeous Grunge Stamp Set is what makes the splatters on the card and that is something you can’t mess up!  This card has a nice mixture of masculine and feminine touches with the splatters and the vintage button.  For this card I used Gorgeous Grunge Stamp Set; Hello, Lovely Stamp Set; Whisper White Cardstock; Crisp Cantaloupe Cardstock; Coastal Cabana Core-dinations Cardstock; Silver Glimmer Paper; Bermuda Bay Ink Pad; Crisp Cantaloupe Ink Pad; Coastal Cabana Ink Pad; Old Olive Ink Pad; Summer Starfruit Ink Pad; Calypso Coral Stampin’ Write Marker; Whisper White Baker’s Twine; Very Vintage Designer Button; 1-3/4″ Circle Punch; Designer Sanding Block; and Stamp-a-ma-jig.

oxox Rachel

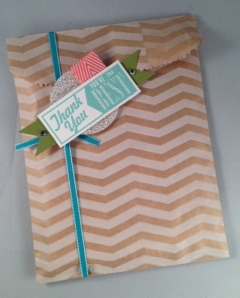
You Make Me Happy

You Make Me Happy

Thank you… You’re the Best

Here’s my third make and take from Convention!  This one is probably my favorite.  Here’s why…  The bag is beautiful but what is inside is even nicer!  Inside there are 5 different kinds of cards AND matching envelopes!  I love the Hello, Lovely Stamp Set because it is so gorgeous.  It makes this bag and card set so nice and a gift that anyone would love.  To make the bag and the cards I used Hello, Lovely Stamp Set; Old Olive Cardstock; Whisper White Cardstock; Silver Glimmer Paper; Tag a Bag Gift Bag; Note Cards & Envelopes; Bermuda Bay Ink Pad; Coastal Cabana Ink Pad; Crisp Cantaloupe Ink Pad; Old Olive Ink Pad; Coastal Cabana Stampin’ Write Marker; Crisp Cantaloupe Stampin’ Write Marker; Bermuda Bay 1/8″ Taffeta Ribbon; Calypso Coral 3/4″ Chevron Ribbon, Stamp-a-ma-jig, and 1-3/4″ Circle Punch.

oxox Rachel

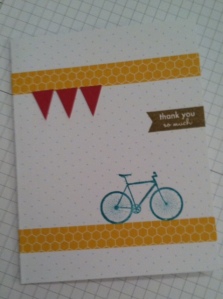
August Paper Pumpkin

Thank you so much

Thank you so much

This is the card that I made from the August Paper Pumpkin kit.  I really love the bicycle, I think it is so adorable!  It is a simple yet very nice thank you card that I think anyone would appreciate!  The colors used in this card are Baked Brown Sugar, Bermuda Bay, Crushed Curry and Raspberry Ripple.

oxox Rachel

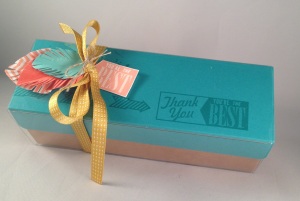
Tag a Bag Gift Box

Thank you... You're the BEST

Thank you… You’re the BEST

I made this fun gift box at Convention.  It was my second make and take that I made there.  I really love the feathers which are made out of paper!  I used the 2-1/2″ circle punch  to punch one circle each from the Calypso Coral Cardstock and the Crisp Cantaloupe Designer Series Paper.  I also punch one circle from the Coastal Cabana Cardstock using the 1-3/4″ Circle Punch.  To create the feather shapes, insert cardstock circles back into the punch about halfway and punch again.  Then fold in half and snip through both layers and rough the edges to add dimension.  To make this box I used Gorgeous Grunge Stamp Set; Hello, Lovely Stamp Set; 2-1/2″ Circle Punch; 1-3/4″ Circle Punch; Bermuda Bay Cardstock; Calypso Coral Cardstock; Whisper White Cardstock; Crisp Cantaloupe Designer Series Paper Stack; Tag a Bag Gift Box; Bermuda Bay Classic Stampin’ Pad; Crisp Cantaloupe Classic Stampin’ Pad; Summer Starfruit 3/8″ Stitched Satin Ribbon, and Linen Thread.

oxox Rachel

Tag a Bag Gift Bag

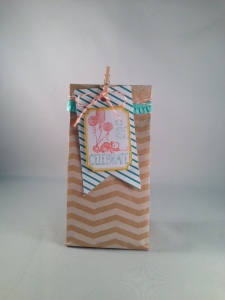
It's your day... CELEBRATE!

It’s your day… CELEBRATE!

I made this fun gift bag at Convention.  It was one of four make and takes.  I used the Tag a Bag Accessory Kit, Tag It Stamp Set, Coastal Cabana 3/8″ Ruffle Stretch Trim, Epic Day This and That Designer Washi Tape, Calypso Coral Stampin’ Write Marker, and Coastal Cabana Stampin’ Write Marker.  To make the tag I used the Calypso Coral and Coastal Cabana Stampin’ Write Markers to color the stamp.  It makes the tag fun and stand out.  This bag would be a great gift bag for someone’s birthday or a birthday party favor!

oxox Rachel